[CI/CD with Drone 101] 03 Deployment Schedule Configuration and Permission Management
Tutorial on configuring deployment schedules and managing permissions through Drone for automated deployment.
Utilizing Drone
to establish a custom automated deployment service.
Drone is a CI/CD system tool developed in Golang.
This tutorial focuses on configuring deployment schedules and managing permissions.
Scheduled Execution (Cron Job)
Setting up schedules was quite challenging initially.
If setting up the service itself took three days, the schedule configuration took about half a month with constant document checking, forum discussions, testing, and debugging.
Many details were only addressed by the author on Gitter or in forum threads, without being included in the official documentation.
Additionally, certain features were not supported for those using Bitbucket.
Custom Execution Time
Service Limitations
In Drone 1.0, customizing the schedule on the interface is not allowed due to potential errors (source
).
Also, the minimum repeat execution time is once every half an hour (source
).
Configuration in Project Files
The author suggests defining the cron job name in the project’s .drone.yml file using the CLI, rather than using expressions (Cron job definition
).
Timezone in Expressions is Fixed
The official documentation mentions that the timezone for scheduling is fixed to UTC (i.e., +0 timezone), so manual conversion is necessary (Cron Timezones ).
The current implementation calculates the execution time based on UTC as opposed to local time.
However, the official documentation also notes that custom schedule times may not be triggered at precise times and may have a slight deviation (reference ).
Creating a Cron Job
While many tutorials use the Drone CLI, it was discovered on the official website that an API can also be used for creating cron jobs (API drone cron create
).
To do this, obtain the token from the User Settings on the Drone page to use as the header in the Post request.
In Postman, create a POST /api/repos/{owner}/{repo}/cron request and add the token to the Headers tab, where the token key is Authorization and the corresponding value has the format Bearer {a string of alphanumeric characters}.
The Body is then used to set the cron job name, execution conditions, and the branch to be executed.
{
  "name": "every2hour",
  "expr": "0 0 */2 * * *",
  "branch": "main"
}
In this example, the condition is 0 0 8-16,*/2 * * *, meaning “execute every two hours from 8 AM to 4 PM”.
Alternatively, it can be set as 0 0 10,12,14,16 * * * to “execute every day at 10 AM, 12 PM, 2 PM, and 4 PM”.
An online tool can be used to generate conditions based on requirements.
Note! The author uses a time format with six digits, including seconds!
Viewing Cron Jobs
Cron List
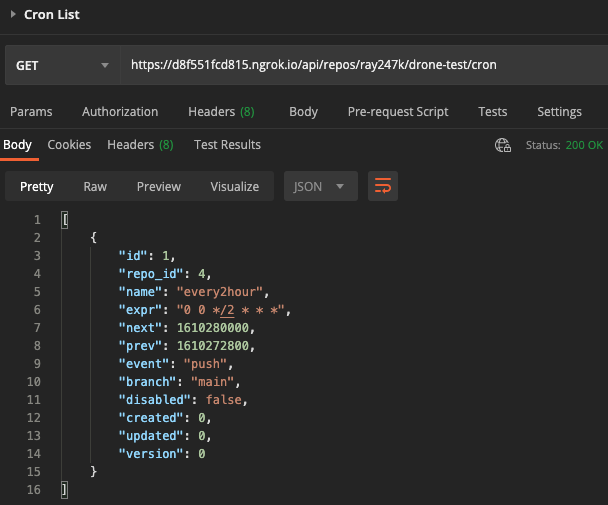
After creation, you can use GET /api/repos/{owner}/{repo}/cron to view the list of all cron jobs.
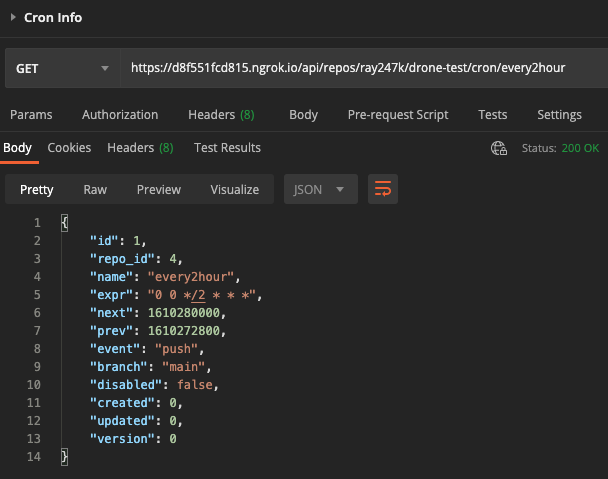
Cron Info
Using GET /api/repos/{owner}/{repo}/cron/{name} to view detailed information about a specific cron job.
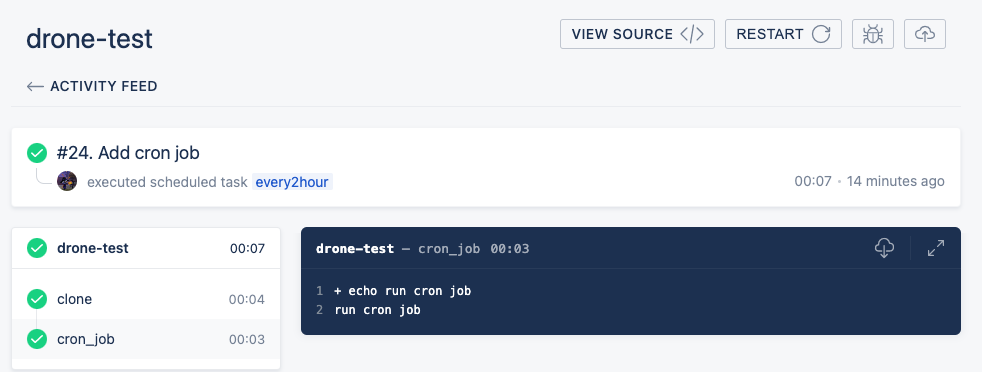
Returning to the Drone backend, accessing the settings page for the project reveals the cron job created using the API!
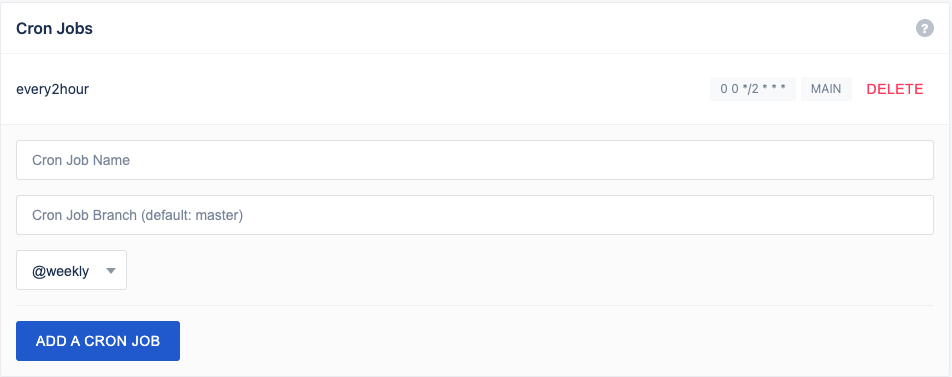
When the scheduled time arrives, the pipeline triggered by the specified cron job name in the .drone.yml file will be executed.
Updating Cron Jobs
To update a cron job, use PATCH /api/repos/{owner}/{repo}/cron/{name}.
The body includes the changes, such as switching the branch to dev or adjusting the execution time to a fixed time each day.
{
  "name": "every2hour",
  "expr": "0 0 2,4,6,8 * * *",
  "branch": "dev"
}
Deleting Cron Jobs
Cron jobs created previously can be deleted using DELETE /api/repos/{owner}/{repo}/cron/{name}.
However, the author prefers using the UI interface to click on DELETE.

Another option is the Drone CLI, which was not used this time but is provided for reference.
Permission Control
If no user is set, the service is open to the public on the online URL (official explanation ).
Drone registration is open by default. This means any user can register an account and use the system.
Admin Permission Configuration
Admin rights must be set up in the drone_server to manage other accounts (DRONE_USER_CREATE
).
- DRONE_USER_CREATE=username:ray247k,admin:true
User List Configuration
Restrict access by setting a user list (official documentation ). Use organizations or user IDs in the list.
- DRONE_USER_FILTER=ray247k,lemon,JohnDoe
However, if Bitbucket is used as the version control platform, organization restriction is not supported (forum thread explanation ). Therefore, anyone with write permissions can access the settings page.

Testing with GitHub shows that organization-based access control is possible and the setting page is not open to everyone.