How to Purchase Your Own Domain from Google Domains
A tutorial on purchasing your own domain using Google Domains.
Previously, I’ve been using free blogging platforms like Blogger.
However, with the rise of personal branding awareness in recent years and feeling limited by the features of the original blog,
not to mention the inconvenience of moving, and the inability to customize SEO and embed tracking codes,
I felt the need to take matters into my own hands.
Having worked in the media industry, I realized that if you want something done right, you have to do it yourself.
I initially moved from Blogger to Medium, then back to Blogger, finding the transition quite cumbersome.
Furthermore, the formatting of code content often gets distorted, and I wanted to record everything using Markdown syntax.
This led me to consider self-hosting, partly as a platform to showcase my skills.
Ultimately, I decided to use Hugo
framework to self-host my blog.
After deciding to self-host, I faced several options.
Hosting directly on GitHub Pages with its default URL seemed convenient, and there weren’t many downsides to it.
However, I wanted to have a sense of ownership, not being reliant on others. Also, in case I decide to switch platforms in the future, I want to be able to take the SEO of my domain with me.
With that preamble, let’s get started on purchasing a domain.
Google Domains
You can buy domains from various places, from the most famous Godaddy to the less recommended PChome.
This time, I chose Google Domains simply out of curiosity, wanting to try a service that others haven’t used before.
Besides, although Godaddy may be cheaper in the first year, after the price hike in the second year,
it’s not as cost-effective as Google Domains, which has a fixed price per year.
Of course, you could buy from Godaddy in the first year and then transfer to Google Domains near the expiration date.
That seems to be the cheapest option.
But I’m too lazy to transfer, and I don’t want to spend extra effort on it in the future.
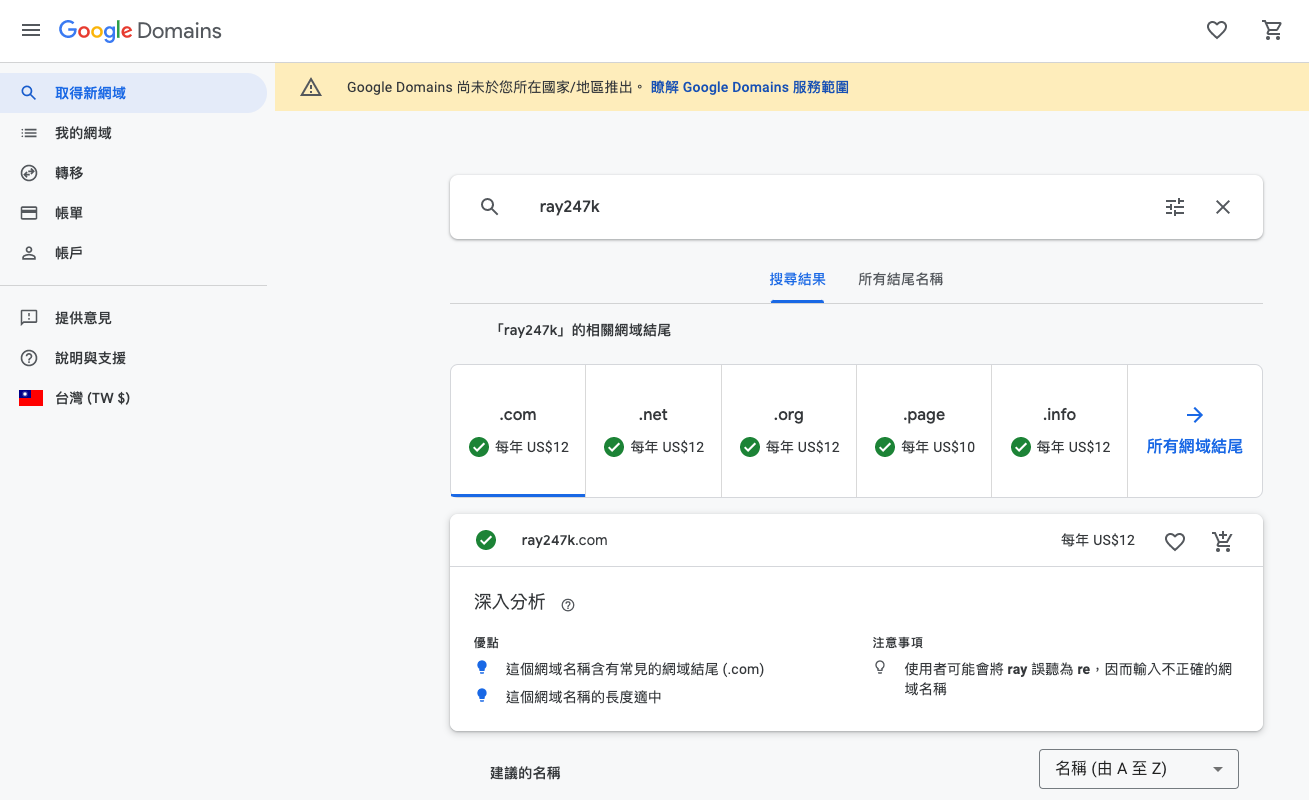
1. Check if the Desired Domain is Available
Go to Google Domains and search for the domain you want to buy.
As an example using the domain I currently use, you can see that different top-level domains have different prices.
Choose one that you like and find appealing. It’s not recommended to use overly unusual names.
For developers, you might want to consider the .dev domain exclusively available through Google Domains!
However, since I plan to use subdomains for multiple sites (I’ll have a tutorial on this later),
and not all of them are aimed at developers, I ultimately chose a .com domain with a fixed annual fee of $12.
Don’t let temporary whims turn your website into a black mark in history!
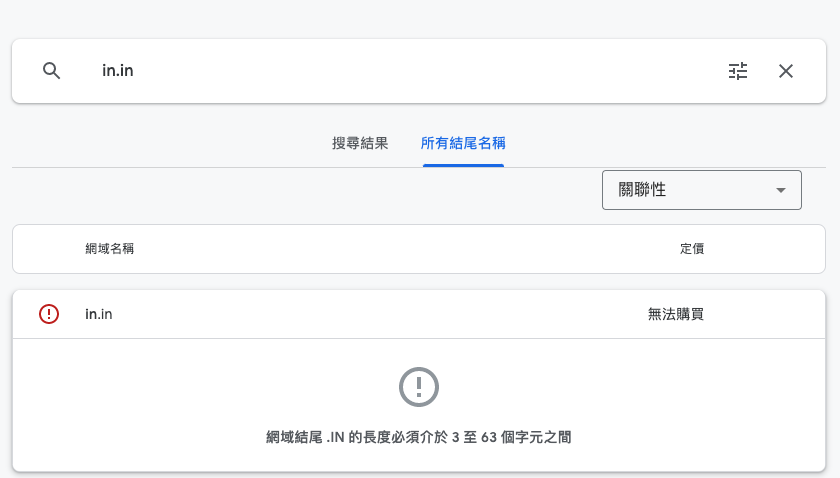
But I admit I’ve searched for strange names, like the .in top-level domain.
Coach! I really want the gg.in.in domain, but I only checked, trust me!
Because in.in doesn’t allow purchases.
2. Go to Cart and Prepare for Checkout
Just follow the website’s steps to enter your information and proceed to the next step. It’s best to fill in everything truthfully.
After all, it’s a domain for your personal brand, and it’s better to be able to contact you in case of any issues.
Enable privacy protection service, which is something you’d have to pay for at Godaddy!
╰(⊙Д⊙)╮What a considerate company╭(⊙Д⊙)╯
╭(⊙-⊙)╯What a considerate company╰(⊙-⊙)╮
It’s recommended to enable automatic renewal.
Otherwise, if the domain suddenly expires one day and you can’t use it, it could cause trouble.
I remember a certain website had a whole morning of downtime because the domain wasn’t renewed on time.
At first, we thought there was a problem with the deployment of the code.
After searching for a long time, we realized it was a joke because the domain expired.

The Google Domains checkout page seems to have been revamped.
I saw in other articles online that after entering the credit card number, it would go straight to checkout.
But in my case, it asked for my zip code in addition to the card number, and it had to be in the format of a US zip code.
If you also encounter the need to enter a zip code, I used 90004, which is a zip code in Los Angeles, California (CA).
After completing the checkout, you should receive an email telling you that you can start using the domain you just purchased!
For other instructions on setting up a custom URL for GitHub Pages and managing subdomains with Cloudflare, stay tuned for future articles.