Setting Up Cloudflare Free CDN and Enabling DNS Hosting
Transferring DNS hosting from Google Domains to Cloudflare and setting up Cloudflare's free CDN.
Google Domains service already provides Domain Name System (DNS) services, allowing you to manage your domain, including adding subdomains.
The reason for transferring DNS to Cloudflare is to utilize Cloudflare’s Content Delivery Network (CDN) and caching, which can increase website loading speed and save server resources. Even though I’m using GitHub Pages, server resources are not a concern.
I’ll write another post later explaining how to set up subdomains and assign them to GitHub Pages.
With this skill, you can continuously generate new URLs with just one domain!
For example, I bought ray247k.com, and this blog’s URL is tech.ray247k.com
, which is an application of subdomains.
That’s why I initially chose the .com top-level domain instead of .dev.
Setting Up Cloudflare to Host Subdomains and DNS
1. Register with Cloudflare
It’s straightforward, just follow the website’s registration process.
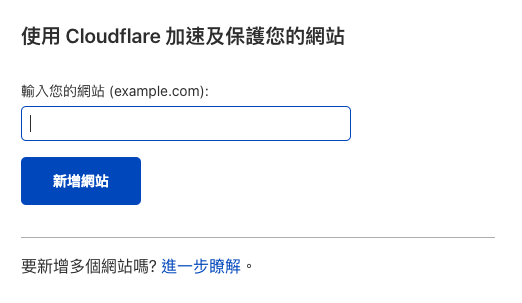
2. Follow Cloudflare’s Guidance to Add a Website (Domain)
Add the domain you purchased to the management list.
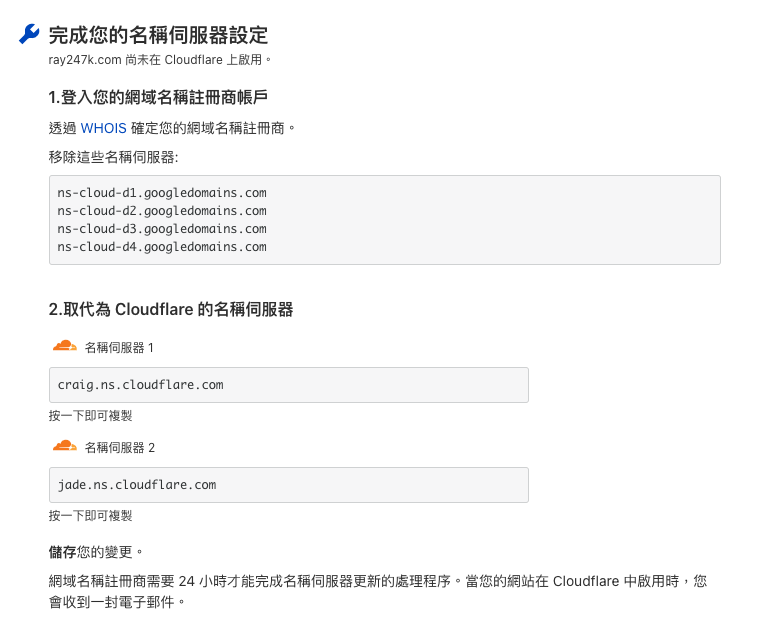
3. Adjust DNS Servers
After adding the website, we’ll see this prompt in Cloudflare.
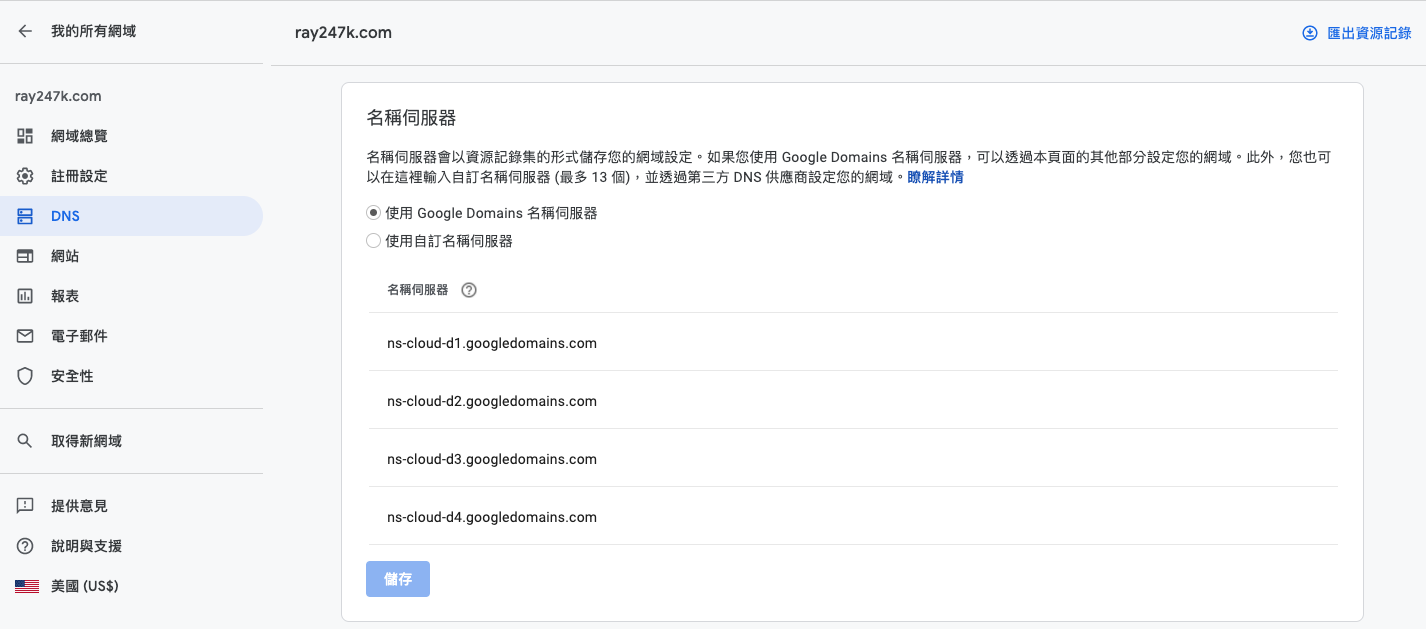
Next, go to the DNS tab in Google Domains.
You’ll see that the default DNS servers are the ones Cloudflare asked us to remove in the previous step.
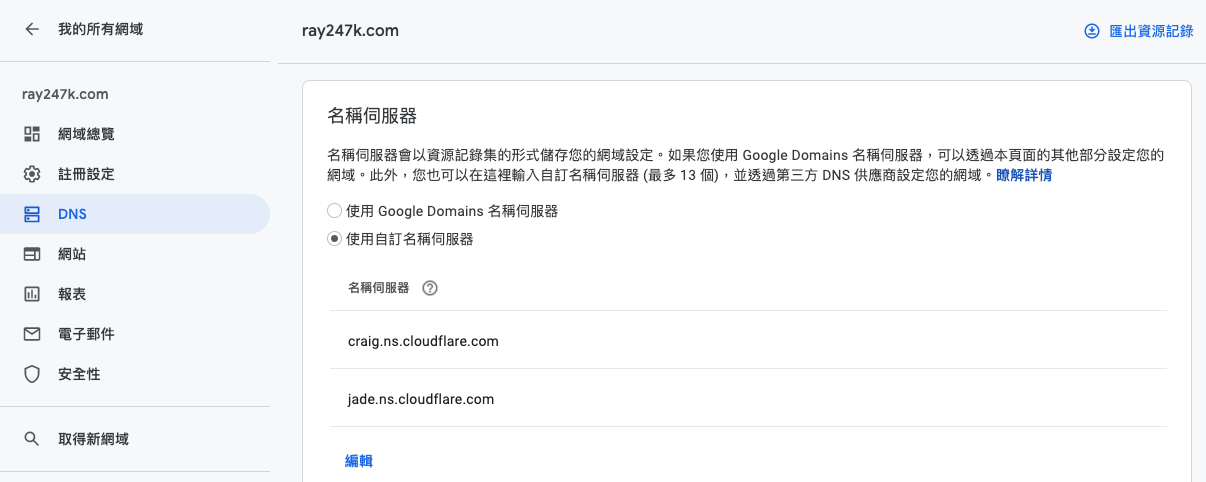
Click “Use custom nameservers” and enter the two addresses provided by Cloudflare.
4. Receive Notification Email Confirming Cloudflare Activation

5. Enable Always Use HTTPS
Redirect all requests made via the “http” protocol to “https”.
Because Cloudflare has default SSL/TLS certificates, you can enable HTTPS without purchasing your own.
This will display a “lock” icon in the browser’s address bar indicating a secure connection!
We only need to enable the redirection service.
Go to the SSL/TLS tab, scroll down to “Always Use HTTPS,” toggle it to enable, and wait for the settings to take effect.
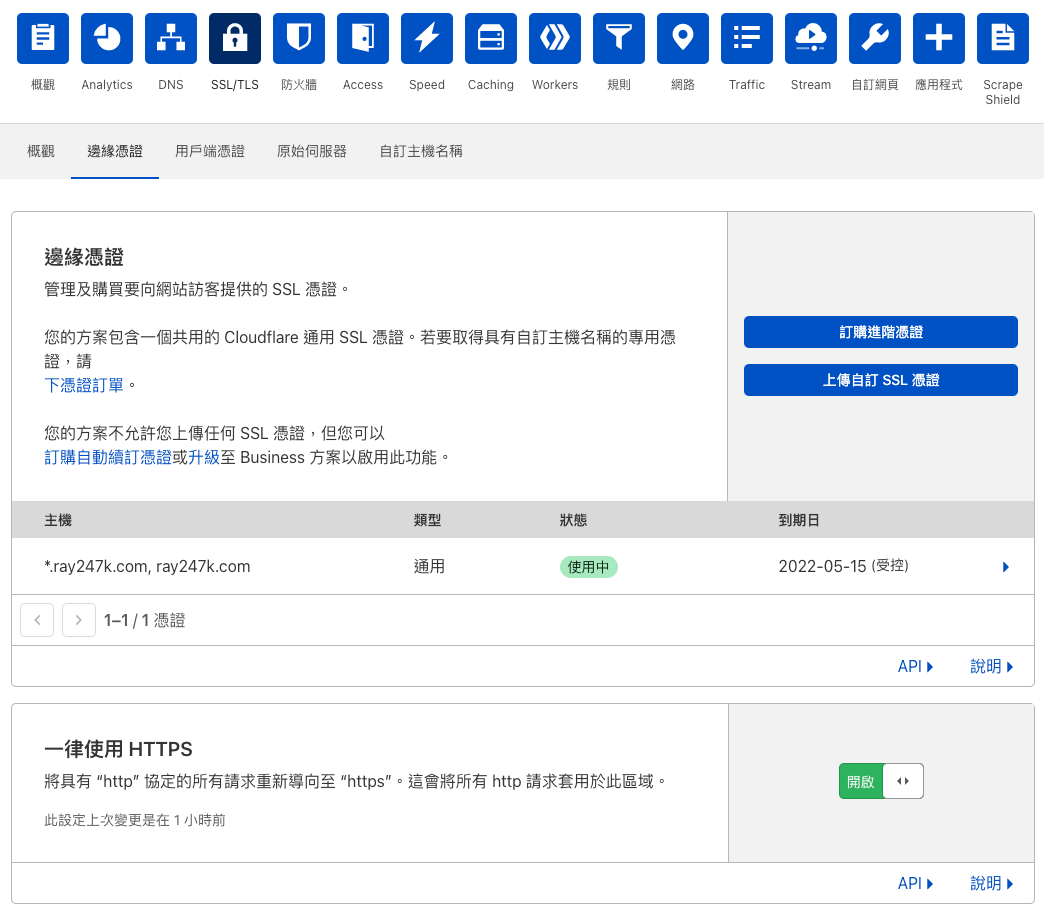
Once enabled, even if you visit the webpage using http, it will automatically redirect to a page starting with https!