Scalable Server 01 Auto Scaling
Configuring Auto Scaling on GCP for Enhanced Server Flexibility

Create image
First, you need to stop the specified VM.
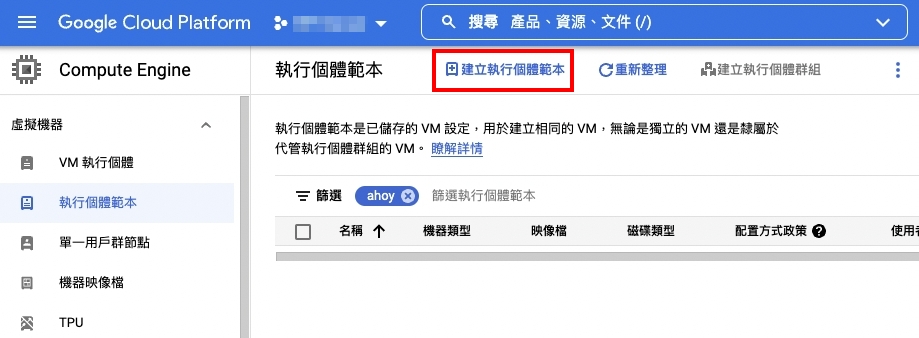
Next, in the sidebar, navigate to Storage -> Images, then click on it to select Create Image.
Make sure not to choose Virtual Machines -> achine Image as it will lead to confusion later on!
In the beginning, I mistakenly pressed Create Machine Image from the VM section and got stuck in this alternate world, which wasted my whole afternoon.
The simplest way to determine this is by not stopping the VM in the first step.
When creating an image, if it doesn’t prompt you to stop, then you’re doing it wrong.
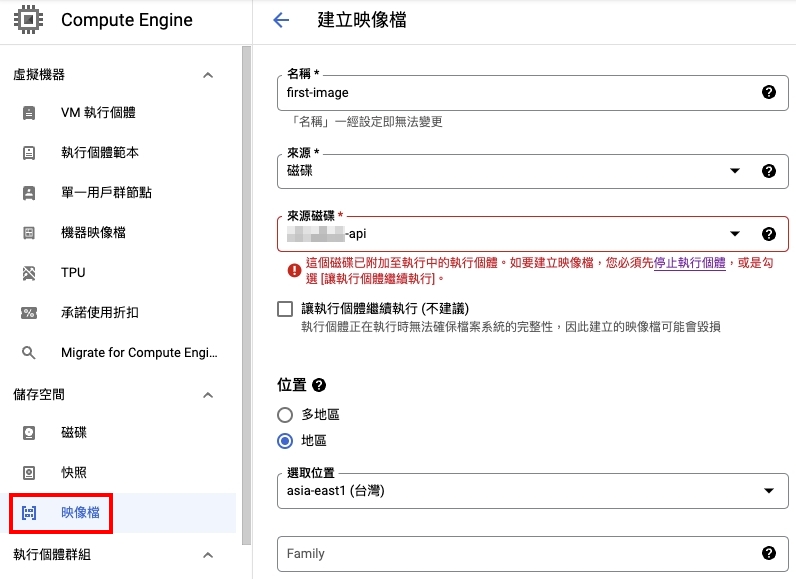
Following the instructions and successfully creating the image, you can proceed to the next step.
Create Instance templates
Go to Instance Templates, then click on Create Instance Template.
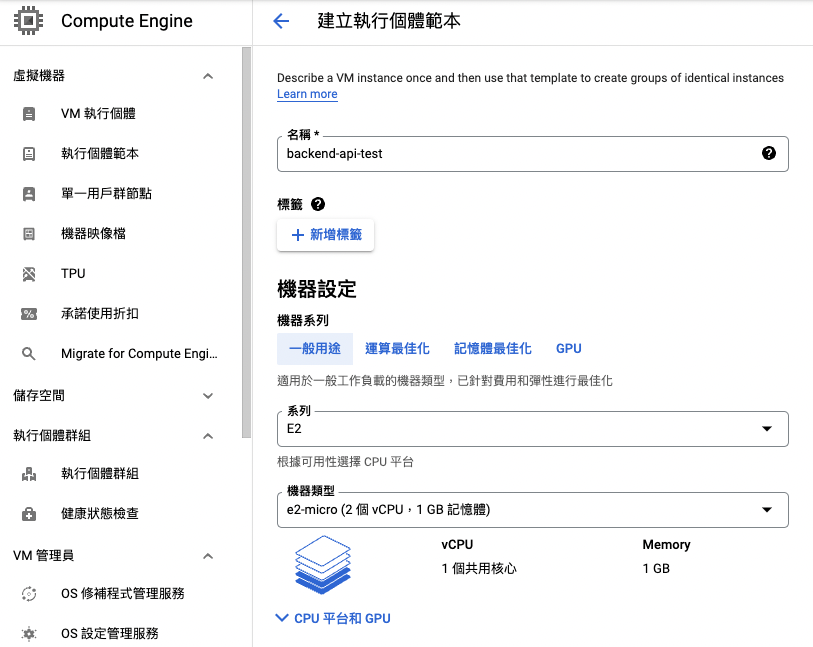
Choose the hardware specifications or hardware rules
This section is where you determine the specifications required for each new instance when launched within the instance group. The setup here resembles the configuration during VM creation. Additionally, you can configure the firewall settings to open ports 80 and 443 if your network service requires them.
Select the VM image as the boot template
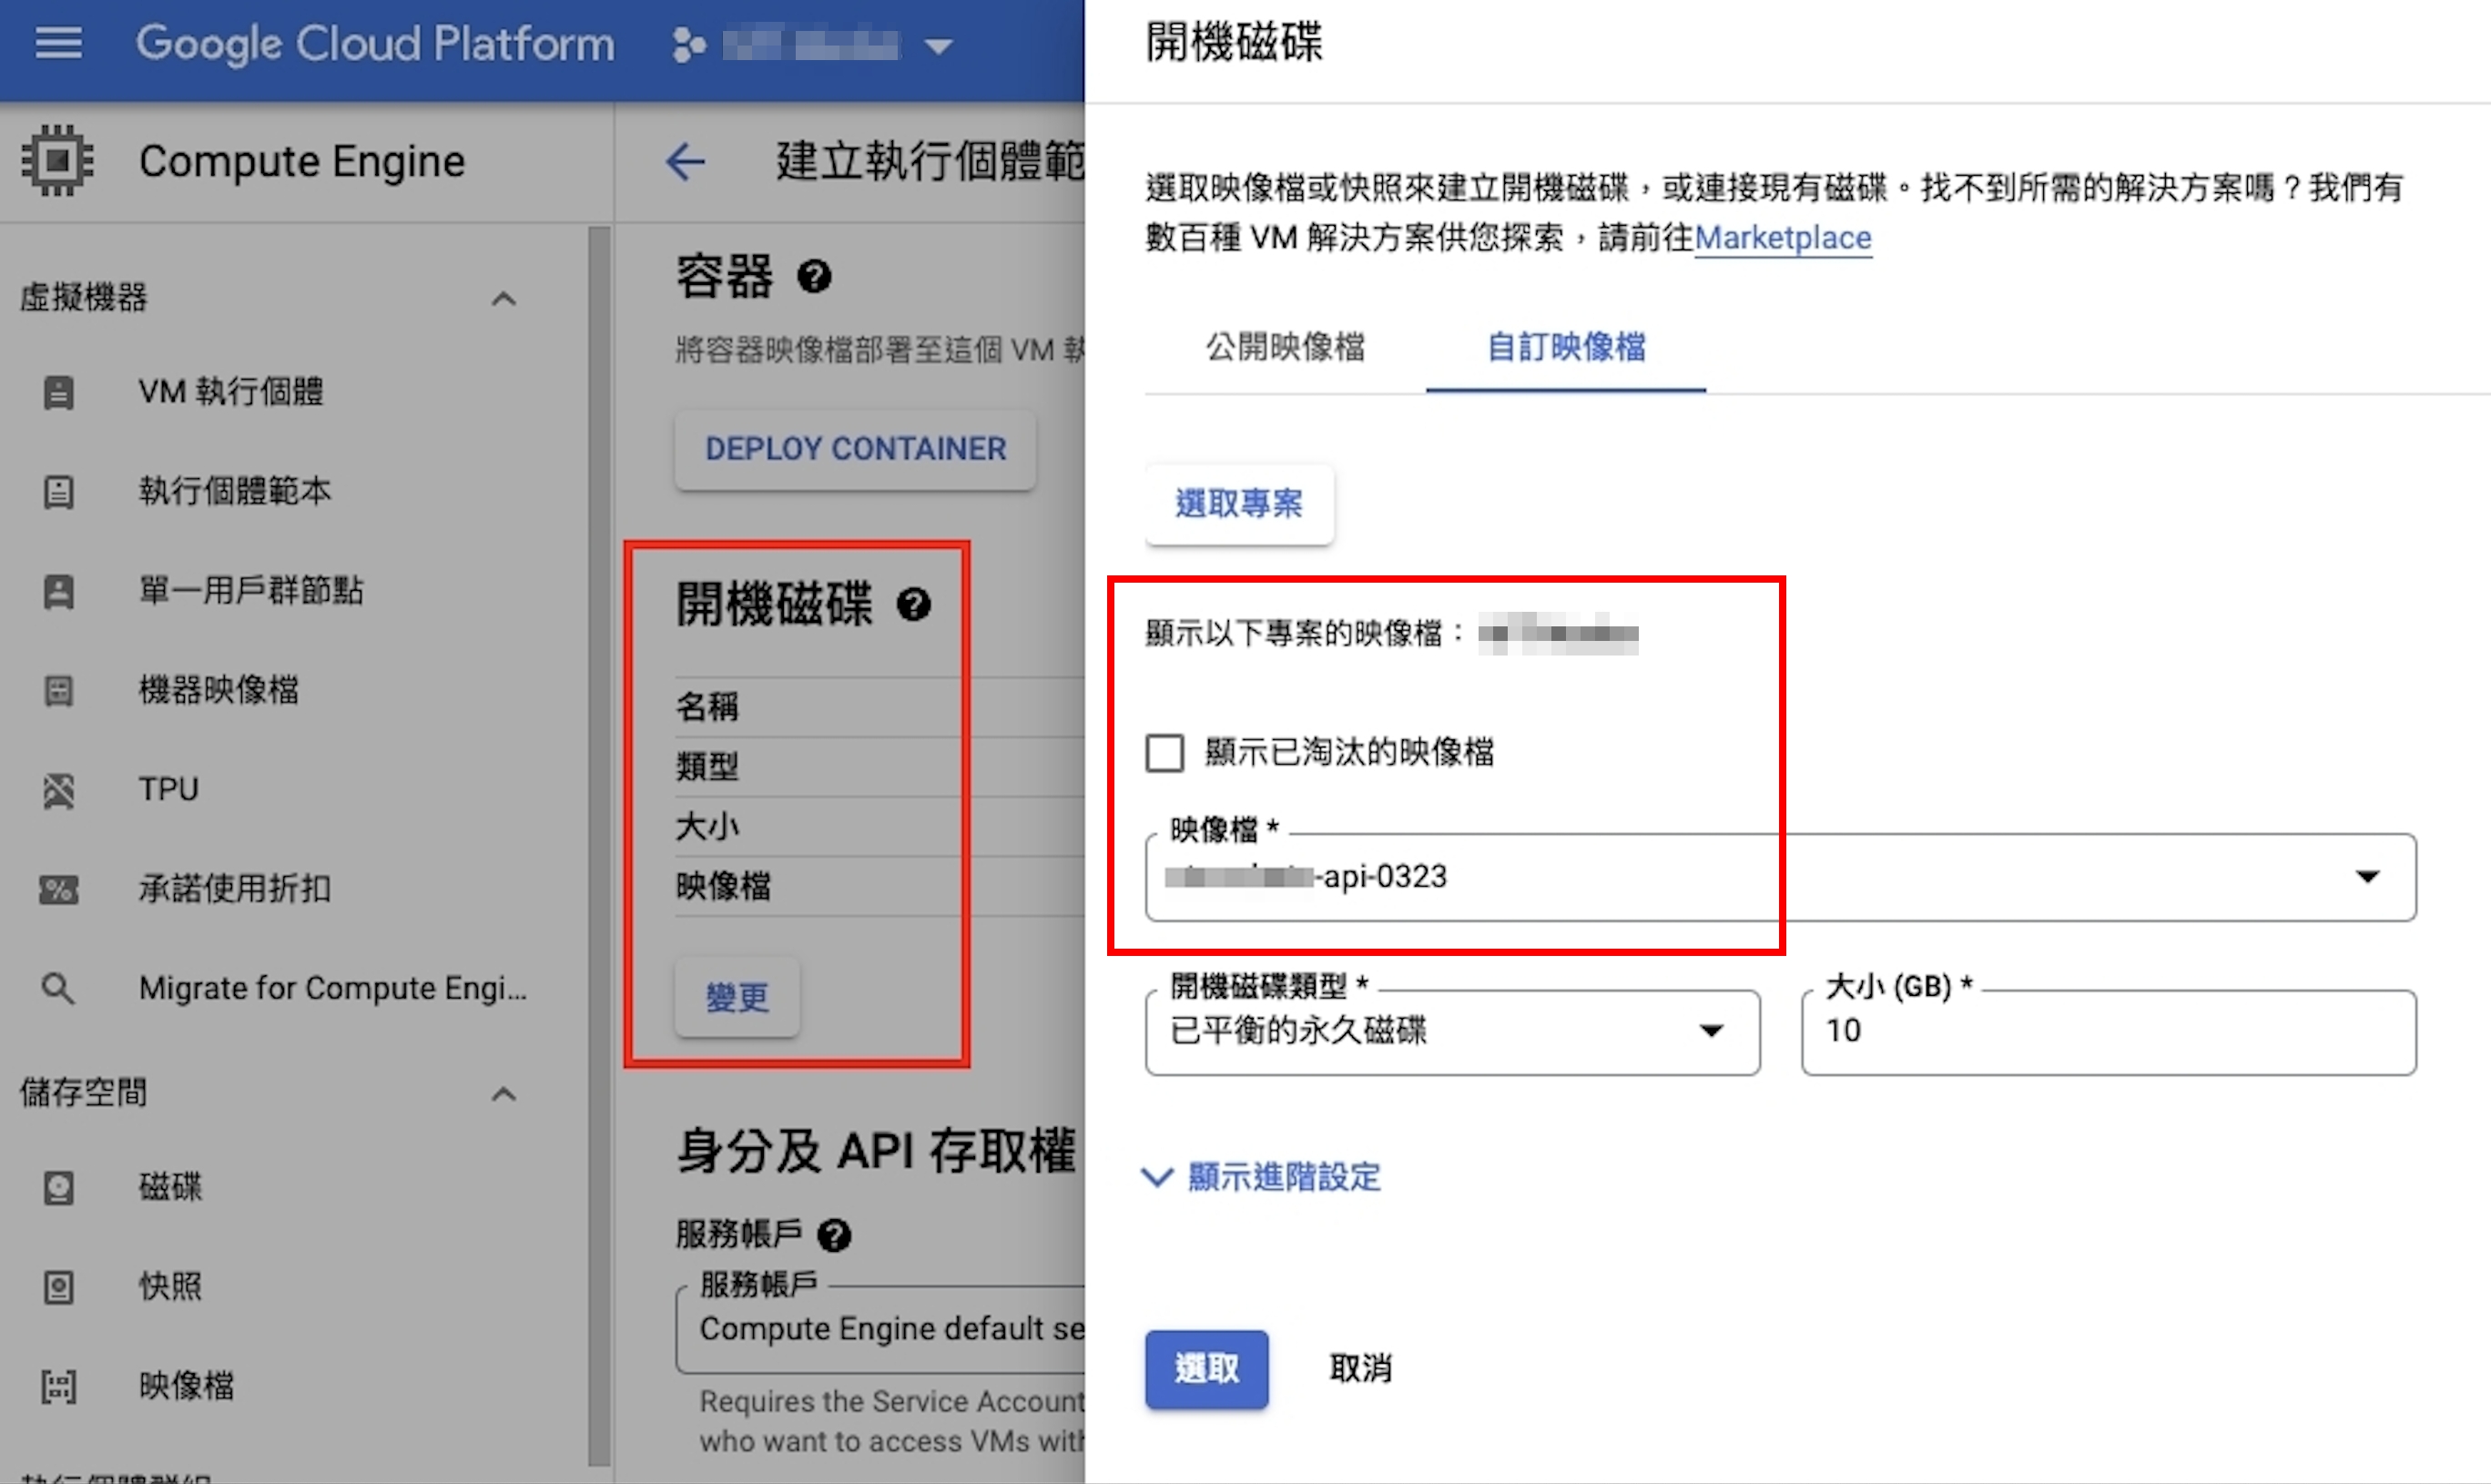
The difference here is that we are using the recently created image as the template.
So, under the boot disk section, click on Change -> Custom image and select the image you’ve just created.
Execute commands automatically at startup
Sometimes, when you start a new VM, you need to run certain commands to start services like Docker.
Without these commands at startup, your VM will only be powered on but won’t have services like the Docker daemon running.
Click on the Management section to expand its contents, and you’ll find instructions for automation.
You can specify boot scripts that will run when the instance starts up or restarts. Boot scripts are useful for installing software, updating items, and ensuring that services run smoothly within the virtual machine.
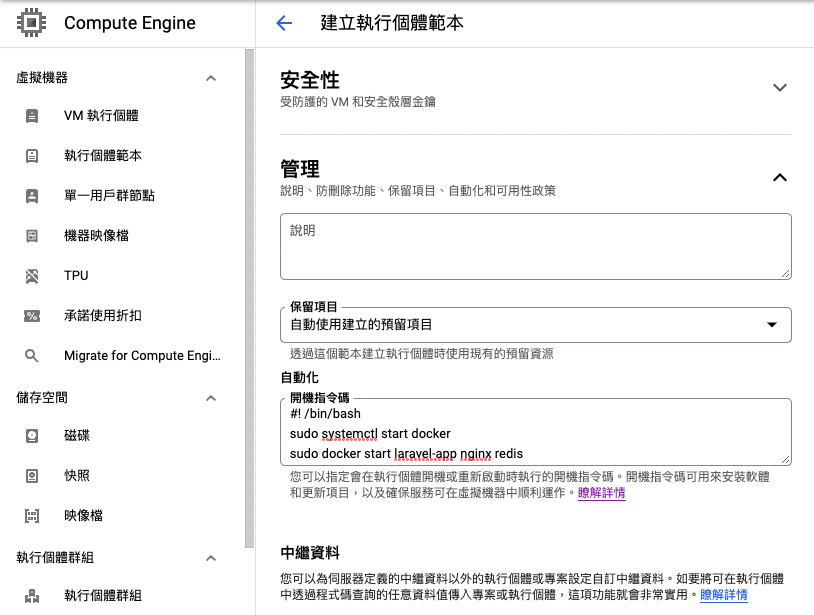
You can include commands in this section to ensure that when the VM starts, the necessary services are initiated.
#! /bin/bash
sudo systemctl start docker
sudo docker start laravel-app nginx redis

sudo docker exec -i laravel-app /var/www/html/artisan migrate
sudo docker exec -i laravel-app /var/www/html/artisan l5-swagger:generate --all
sudo docker exec -i laravel-app /usr/bin/supervisord -c ./builds/docker/beta/php81/horizon.conf
sudo docker exec -i laravel-app /var/www/html/artisan queue:work &
Official documentation: Using startup scripts on Linux VMs
Instance Group
When the triggering conditions are met, the instance group will automatically configure machines based on the previously set instance template.
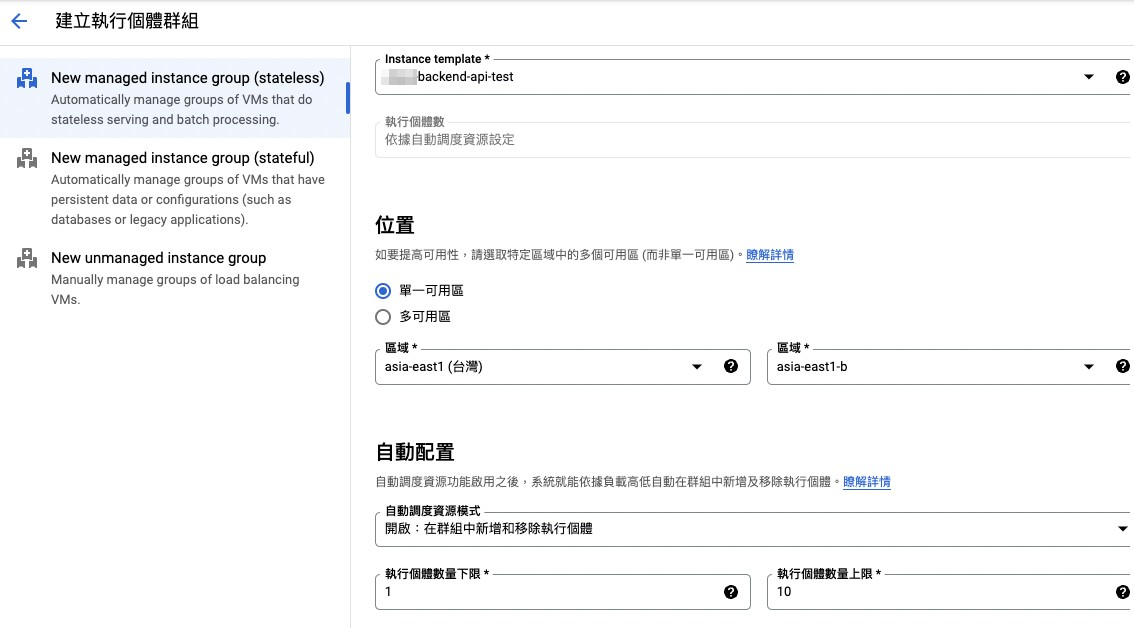
To begin, open the Instance Groups and click on Create Instance Group.

On the interface, you will see three options on the left.
The interface might have changed since the existing online articles were published.
- New managed instance group (stateless)
- New managed instance group (stateful)
- New unmanaged instance group
Among these options, only the two under Managed Instance Group have Auto Scaling functionality.
Additionally, the Unmanaged Instance Group allows you to add existing VM instances without the need to create an instance template first.
Reference documentation: Using managed instance groups
Select the instance template you want to use and specify the Auto Scaling rules.
Once done, click on the Create button at the bottom to complete the creation of the instance group and the Auto Scaling configuration.
Configure instance group health checks and automatic healing
To ensure that newly started instances are available, automatically shut down any non-functional instances,
and replace them with new ones, open the instance group’s editing page, and scroll down to the Autohealing section.
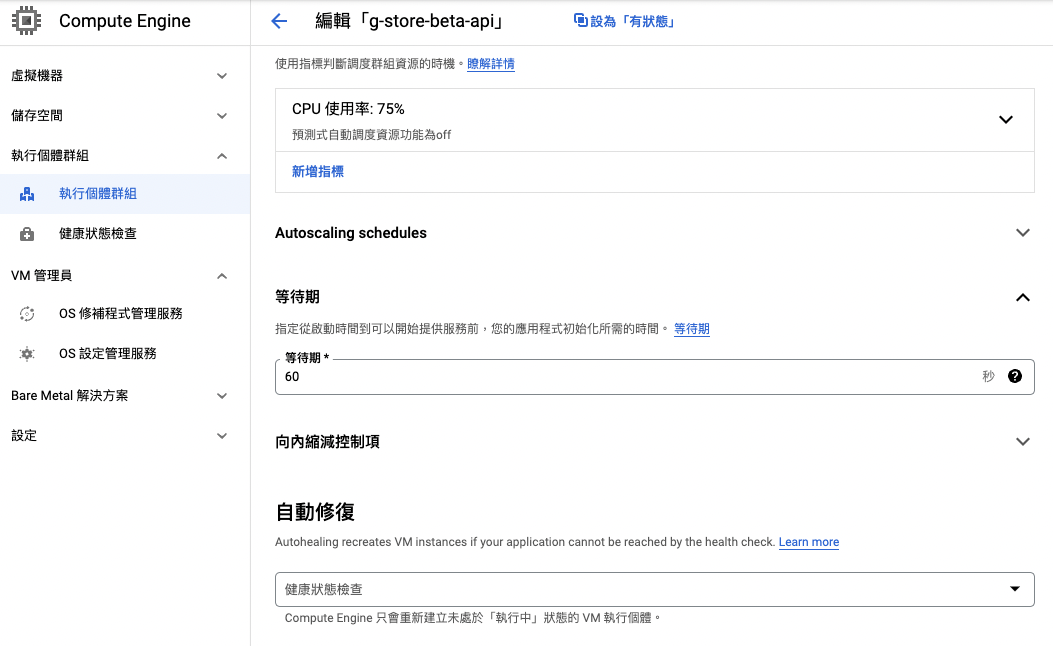
Select Create Health Check and configure it by providing a name and other settings.
For example, if you choose the HTTP protocol, you can send requests to specific routes, while the default TCP option simply checks for normal transmission.
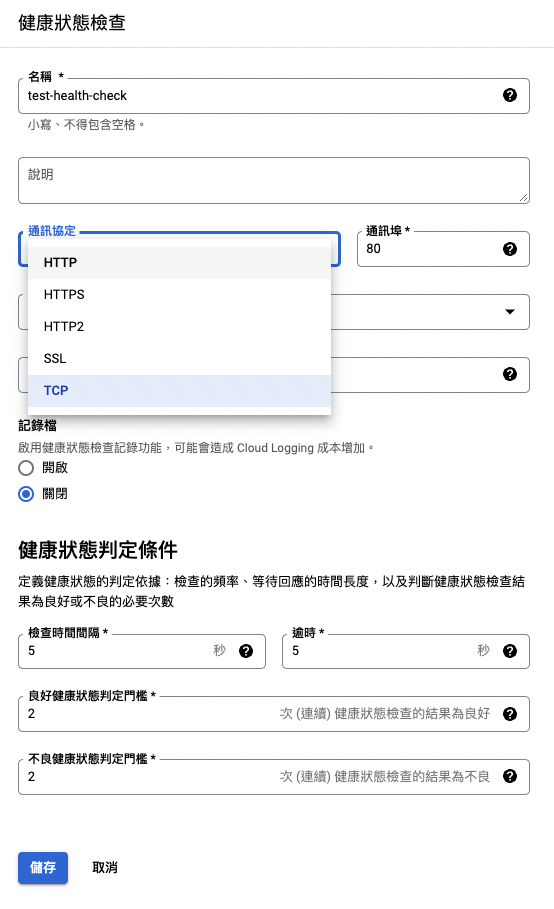
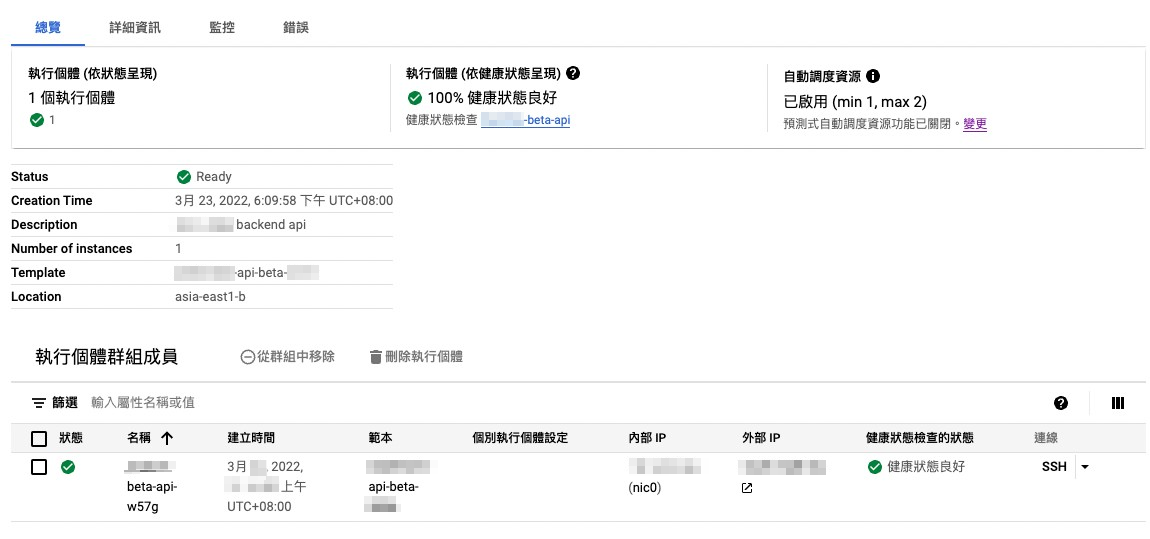
After configuring the health check, let it run, and then go back to the instance group’s detailed page to check the health report. If everything is fine, it should indicate that everything is healthy without any issues.
Rolling Update
When a new image is created, you’ll need to create a new instance template first.
Then, you need to go back to the instance group and edit it to use the new instance template.
This ensures that new instances launched in the future will use the updated template.
Modifying the template won’t automatically restart existing instances.
If you want to achieve seamless updates for online services, you might consider implementing a rolling update.
To perform a rolling update, go to the Instance Groups, select the newly created instance group, and look for a button like UPDATE VMS.
The button name may vary, so please check for a similar option.
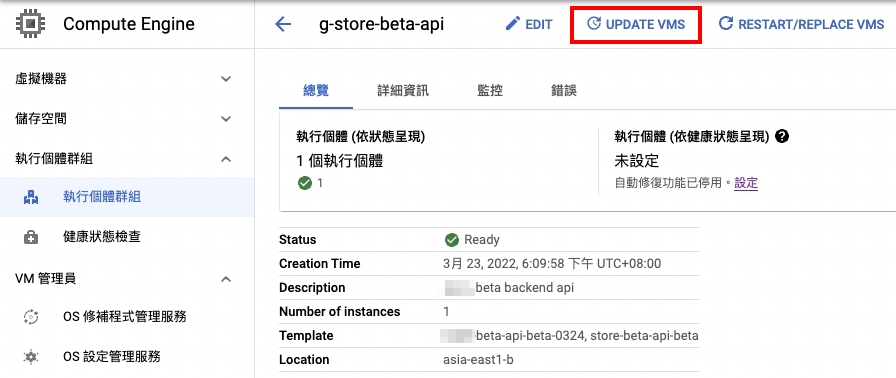
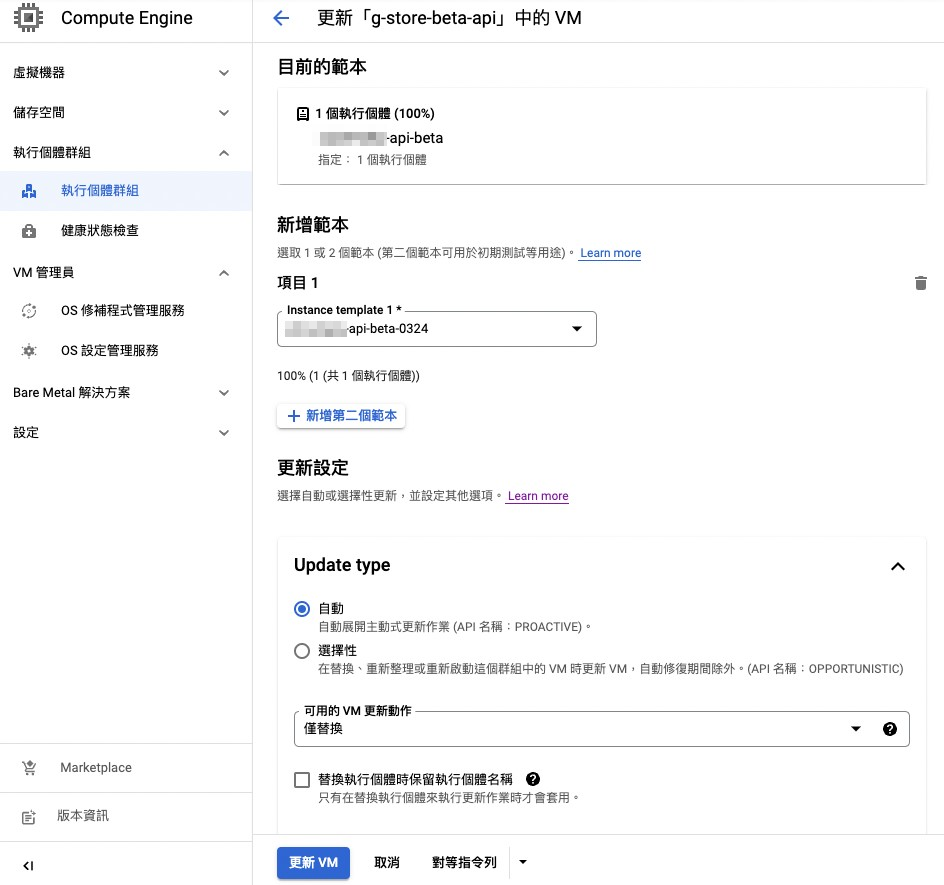
Next, select the new instance template and in the Update Settings, choose Automatic for the Update type.
This ensures that not only new VMs but also existing ones are replaced with the new template.
You will see that it starts a new instance using the new instance template.
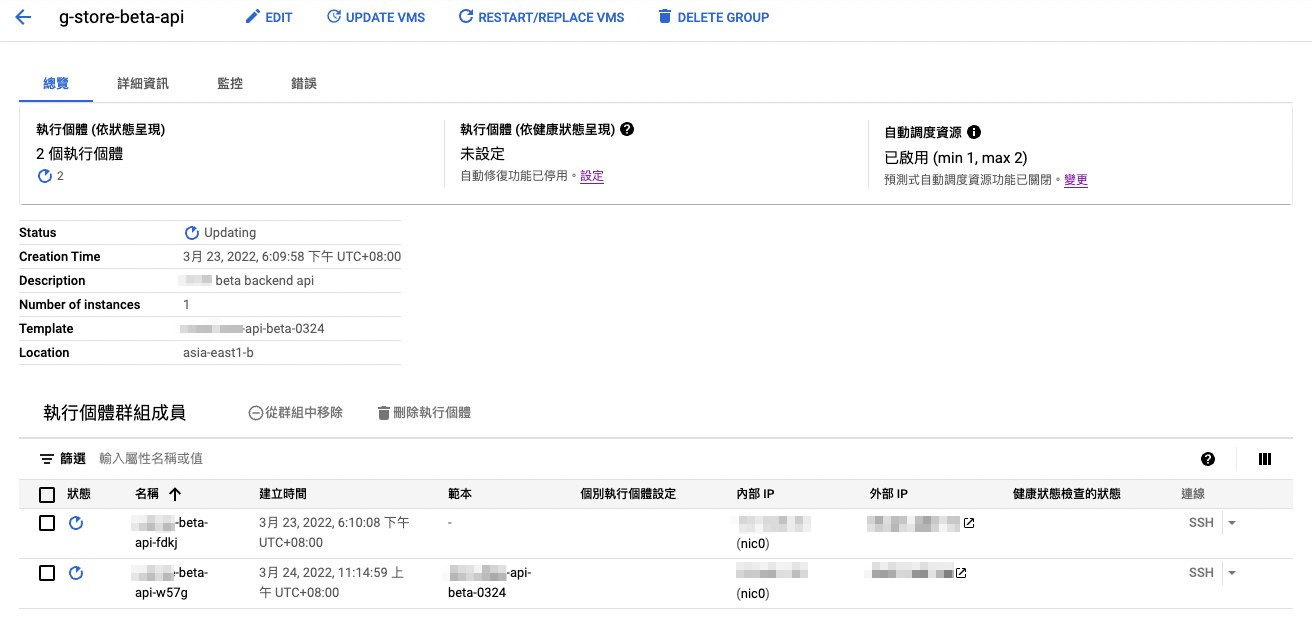
Once the new instance template has been successfully started, it will proceed to delete the old instances.
This ensures a seamless upgrade without impacting your online services.
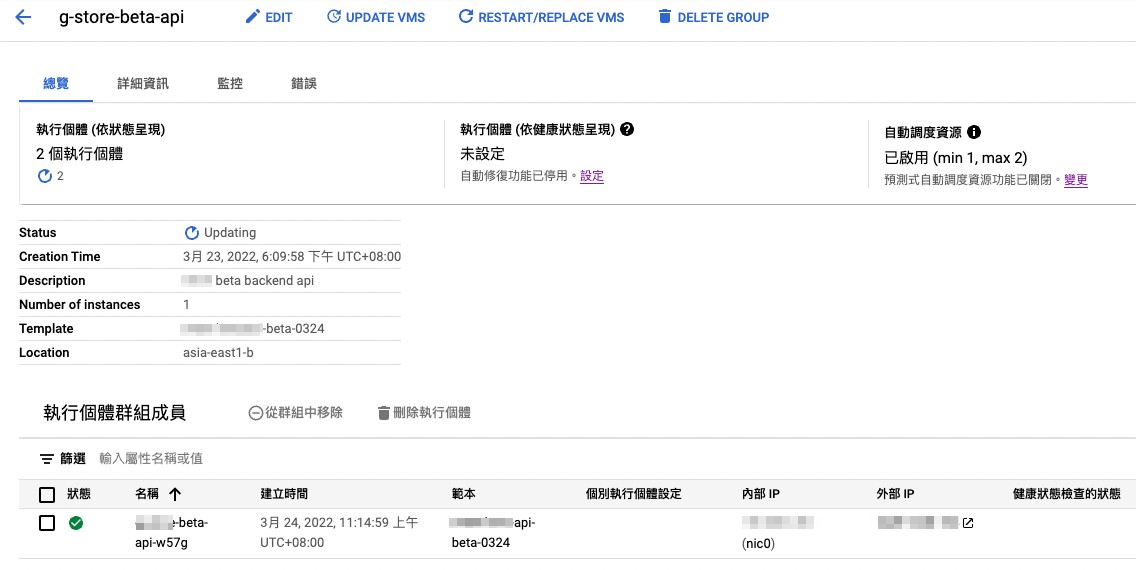
At this point, the service is not fully functional. The instance group is still a collection of individual, independent hosts. While it has the ability to automatically scale the number of hosts, it doesn’t inherently handle request routing or load balancing.
In accordance with the diagram below. Currently, we have only completed the Instance Group and the subsequent steps.
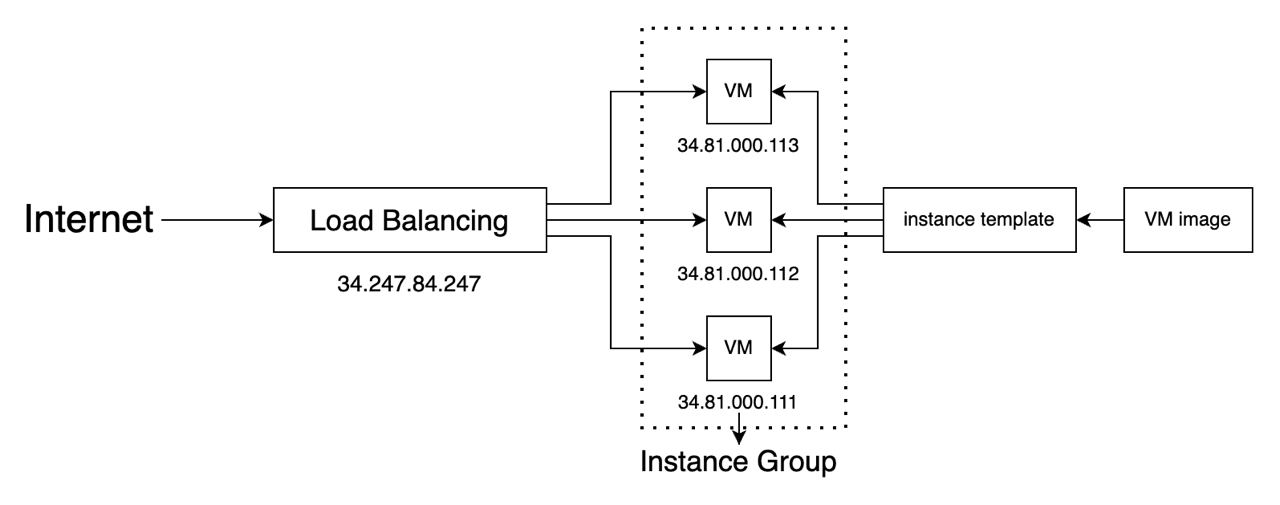
We also need to use the Load Balancing service to provide a fixed IP address responsible for receiving all requests.
Through Load Balancing, we can distribute traffic to individual hosts within the instance group.
We will talk about this in the further post.


