Jenkins 03 打包 Docker image 並推送到 GCR
打包 Docker image 並在 pipeline 中使用 gcloud 指令推送到 Google Container Registry 儲存映像檔

Google Container Registry 是 Google 提供用來儲存、管理和保護 Docker 容器映像檔的服務
這次要做的事是打包 Docker image,再透過 gcloud 指令推送到 GCP 以便未來部署主機時使用
GCR(Google Container Registry 服務)
首先要先有一個 Google Cloud 專案
可以根據官方文件:Creating and managing projects
的說明建立
在 Jenkins 主機安裝 gcloud
以下就照著官方文件:Installing the gcloud CLI 一步一步安裝
準備工作
先確定有安裝以下套件:apt-transport-https、ca-certificates、gnupg
可以透過指令列出所有已安裝的套件列表
apt list --installed
如果沒安裝好,使用指令安裝
sudo apt-get install apt-transport-https ca-certificates gnupg
加入 gcloud CLI 的發行版 URI 作為套件來源
echo "deb [signed-by=/usr/share/keyrings/cloud.google.gpg] https://packages.cloud.google.com/apt cloud-sdk main" | sudo tee -a /etc/apt/sources.list.d/google-cloud-sdk.list

# 如果不支援 signed-by,則使用
echo "deb https://packages.cloud.google.com/apt cloud-sdk main" | sudo tee -a /etc/apt/sources.list.d/google-cloud-sdk.list
導入 Google Cloud 公鑰
如果apt-key指令支援--keyring參數
curl https://packages.cloud.google.com/apt/doc/apt-key.gpg | sudo apt-key --keyring /usr/share/keyrings/cloud.google.gpg add -
否則
curl https://packages.cloud.google.com/apt/doc/apt-key.gpg | sudo apt-key add -
至於 Debian 11+ 或 Ubuntu 21.10+ 不支援apt-key指令的發行版
curl https://packages.cloud.google.com/apt/doc/apt-key.gpg | sudo tee /usr/share/keyrings/cloud.google.gpg
更新並安裝 gcloud CLI
sudo apt-get update && sudo apt-get install google-cloud-cli
初始化 gcloud
因為我們是在 GCP 同專案中的 VM 操作 gcloud,所以省略了gcloud auth login的步驟
而是直接使用 VM 主機作為登入帳號,若是輸入指令則會詢問你是否繼續
You are running on a Google Compute Engine virtual machine.
It is recommended that you use service accounts for authentication.

You can run:

  $ gcloud config set account `ACCOUNT`

to switch accounts if necessary.

Your credentials may be visible to others with access to this
virtual machine. Are you sure you want to authenticate with
your personal account?

Do you want to continue (Y/n)?
查看目前所有專案
gcloud projects list
如果遇到
ERROR: (gcloud.projects.list) PERMISSION_DENIED: Request had insufficient authentication scopes.
首先停止運行 VM並進到編輯頁面
找到存取權範圍並開啟允許所有 Cloud API 的完整存取權
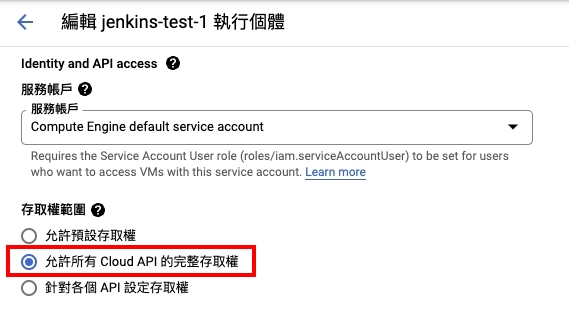
重新啟動 VM 之後執行指令,照著提示訊息設定
gcloud init

# Your Google Cloud SDK is configured and ready to use!
可以透過指令來確定設定檔內容
gcloud config configurations list
設定 Jenkins 推送權限
確認 gcloud 指令可以使用後,要設定 Jenkins 對 GCR 的推送權限
產生 GCP 金鑰
進入 GCP 控制台的API 和服務左方點選憑證頁籤
點選建立新憑證並選擇服務帳戶
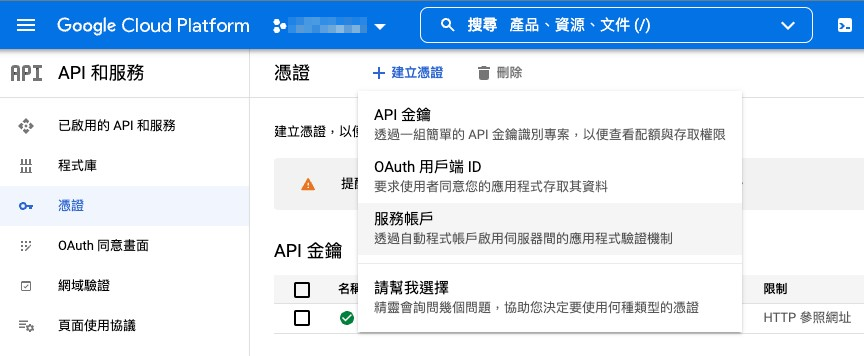
跟著提示建立好之後點選列表中剛剛建立的帳戶進入編輯頁面
並且切換到金鑰頁籤中:新增金鑰 -> 建立新的金鑰
並選擇「JSON」類型
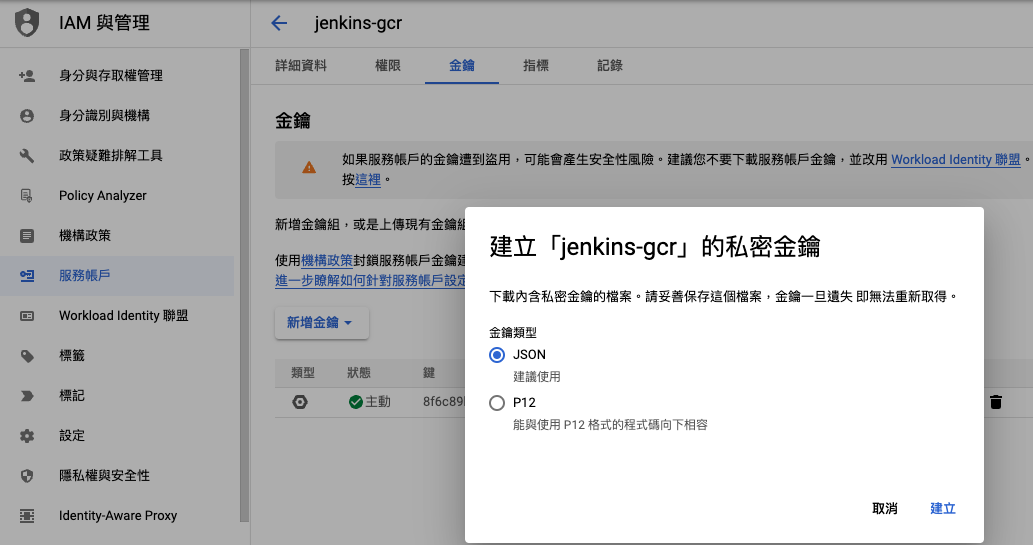
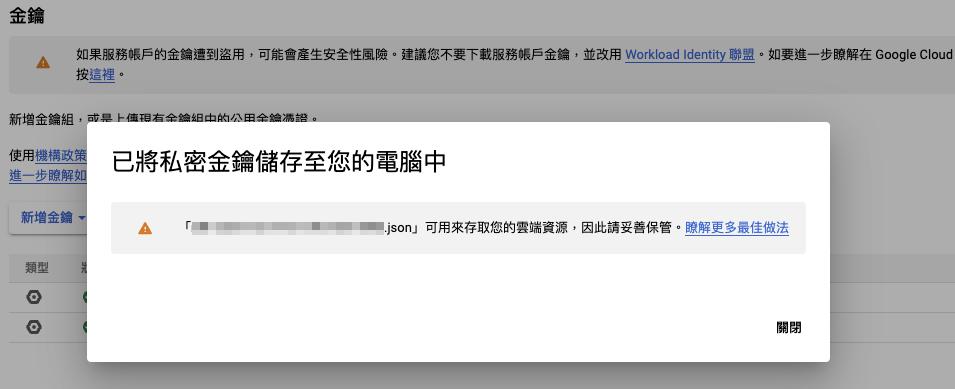
接著就會跳出下載提示,將 JSON 格式的金鑰下載到本機中
設定金鑰到 Jenkins
進到Jenkins -> 管理 Jenkins -> Manage Credentials
選擇作用範圍,這邊用預設的Jenkins也就是全域(global)
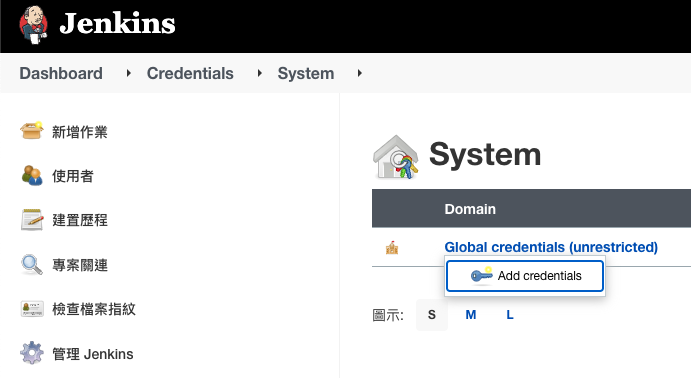
按下 Add Credentials 後Kind選擇Secret file並填寫相關設定
- ID:在 Jenkins 中呼叫用的唯一識別 ID,本文章範例中取叫
jenkins-gcr - File:把剛剛下載的 json 金鑰上傳
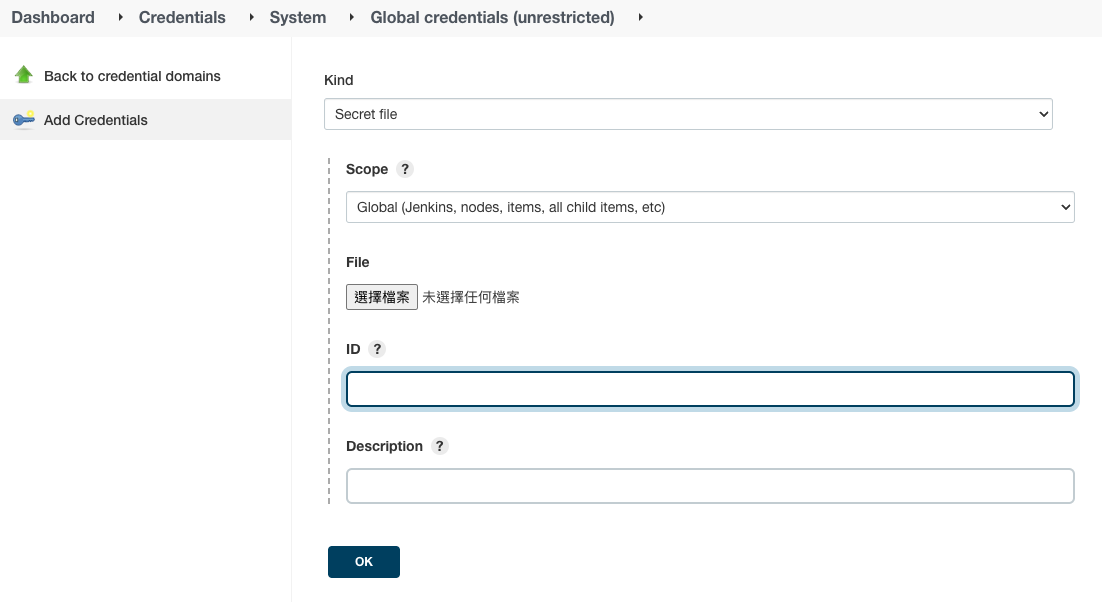
如此就完成 Jenkins 金鑰設定
Pipeline 範例
// jenkinsfile
pipeline {
    agent any

    environment {
        GCR_HOST   = "asia.gcr.io"        // GCR 主機位置選離自己近的會比較快,或是直接 gcr.io
        PROJECT_ID = "my-project-315408"  // GCP 專案的 ID

        FOLDER  = "my-project-backend-test"
        VERSION = "${TAG_NAME}"
        IMAGE   = "$GCR_HOST/$PROJECT_ID/$FOLDER:$VERSION" // 組裝出 image 名稱
    }

    stages {
        stage('Build docker image') {
            when {
                branch 'main'
            }
            steps {
                // 打包的 docker 指令,指定 dockerfile 在專案中的路徑
                sh "docker build . -f ./builds/docker/php81/Dockerfile -t ${IMAGE}"
            }
        }
        stage('Push image to Google Container Registry') {
            when {
                branch 'main'
            }
            steps {
                // jenkins-gcr 就是上面設定過的金鑰唯一識別 ID
                withCredentials([file(credentialsId: 'jenkins-gcr', variable: 'GC_KEY')]) {
                    sh "cat '$GC_KEY' | docker login -u _json_key --password-stdin https://asia.gcr.io"
                    sh "gcloud auth activate-service-account --key-file=${GC_KEY}"
                    sh "gcloud auth configure-docker"

                    echo "Pushing image to GCR"
                    sh "docker push ${IMAGE}"
                }
            }
        }
    }
}
接著就是觸發 Jenkins 服務,範例中是推送 commit 到 main 的分支上
檢查儲存位置
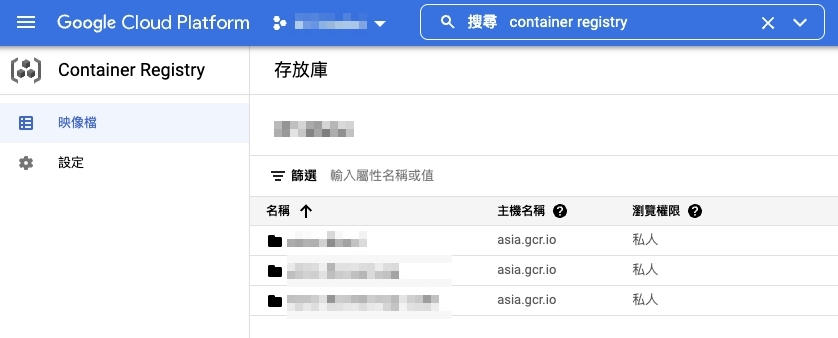
若是沒有錯誤訊息,則可以到Google Cloud Registry頁面查看
把剛剛上傳的 image 名稱想成在 linux 終端機下指令,就可以理解 GCR 中的資料夾結構
